How to use the VITA Color Guide
to find the best CUSTOMIZED SHADE
Do you want to choose the ideal shade to reproduce a natural tooth? Take it slowly because it’s not an easy task! To help you out and avoid making mistakes when making your choice, VITA has created the composite shade guide that will help you choose the desired shade.
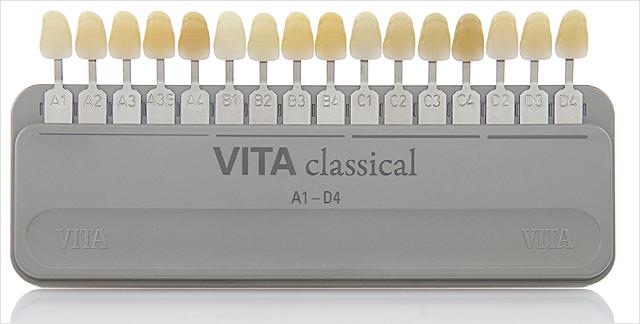
The VITA Classical shade guide allows you to choose the best composite shade with the given the diverse range of shades found in our nature teeth.
How can I choose the best composite shade with the VITA Classic Guide?
With the Classical VITA color guide there are 16 shades ranging from A1-D4, and you’ll be able to find the best shade for your dental restorations. The classification range allows you to find the shade closest to the tooth and then define the brightness.
1- Shade
The VITA guide colours are primarily organised by shades:
* Reddish-brownish: A1 – A2 – A3 – A3.5 – A4
* Reddish-yellowish : B1 – B2 – B3 – B4
* Greyish : C1 – C2 – C3 – C4
* Reddish-grey : D2 – D3 – D4
2- Brightness
Within these shades, either A, B, C or D, the shades are classified by a number from the lightest, 1, to the darkest and most intense, 4. Thus, a shade A1 will be a reddish-brown shade, just like shade A2, but the latter will be darker.
3- Choose the composite
Once the shade has been determined, you can use the dental composite of the defined shade. Many brands use the VITA classification system defined above. One option is the Tetric Evoceram from Ivoclar Vivadent which offers very good quality composites with 16 VITA shades. Similarly, Gaenial composites offer a wide range of shades corresponding to VITA tones.
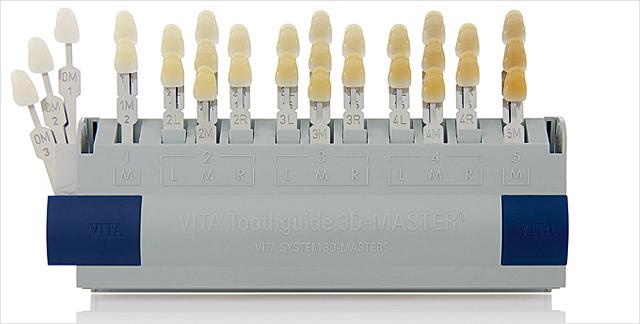
Go further: find the perfect composite shade with the Master 3D VITA guide.
After several statistical studies on the natural shades of patients’ teeth, the VITA brand has improved its color chart. They realized that the previous color chart only covered some of the white shades actually found in patients and that some of the colors on the chart were not commonly found in patient’s teeth.
To do this, VITA created the Master 3D Color Guide with 26 shades and three color selection steps: identify the brightness group, find the saturation level and then find the color.
4- Identify the brightness group
First of all, it is a question of identifying the brightness group. On the VITA 3D Master color chart, the brightnesses are classified from the lightest (group 0, corresponding to the bleach colours) to the darkest (group 5).
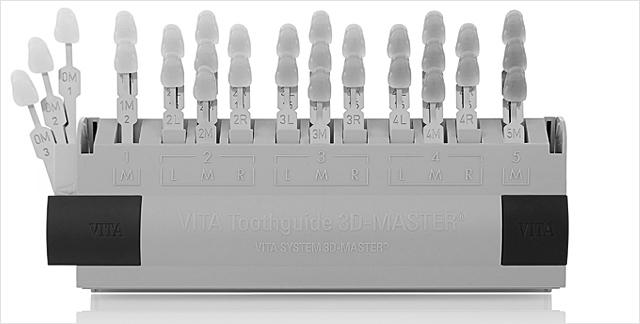
To do this, you can also use a black and white photo of the colour chart, this can make it easier for you to find the brightness group.
Imagine that we have identified that for the tooth we want to restore, the brightness group corresponds to group 2.
5- Find the Color
Once the brightness group has been selected, the color must be identified. Of course, teeth can have a yellow or red color. This is identified by the letters L, M or R in the light categories.
* L corresponds to yellow
* M is neutral
* R corresponds to red
In our example, in group 2 we look at whether the tooth’s shade is closer to one colour or the other. Having a slightly pinkish shade, the tooth will correspond to group R. Thus, we have identified Group 2 R.
6- Find the intensity level
The last step is to find the intensity level. Take out the intensities of the identified group. It’s then a matter of checking the intensity from 1 to 3.
To take our previous composite example, we just have to choose the intensity among the references of this group: it will correspond to intensity 2 for example. The corresponding shade is therefore 2R2.
7- Which composite should I choose once the colour has been determined?
With the VITA Master 3D colour guide, you can now accurately determine the natural colour of your teeth. To then choose the best composite, the guide gives you the exact composition of the composites to be applied. Indeed, the guide provides a precise mathematical definition of tooth shades and gives you the opportunity of mixing them togeth


